Robust Assessment

The Robust Assessment is an interactive experience that consists of 16 questions. This experience displays many micro-animations and utilities interactive components such as accordions, flows, and reveals. Aside from using Ion default components, the assessment itself provides users with custom results and suggestions.

COMPLEXITY

High

TYPE

Assessment

USE CASE

Lead Generation

Features available

Here are the major features, abilities, and interactive elements used in this template.

Quiz

Quiz is built with Form and will allow you to build simple to complex forms that contain different types of inputs and toggles, and can be combined with rules to create logic based results. Use cases for a Form are quizzes, assessments, calculators, and traditional forms.

Reveal

Reveal will allow you to create two-state interactive content. A use case for this would be an information tooltip, where in one state an information icon is seen but when hovered or clicked on, a second state is shown displaying the tooltip text.

Animation

Animation will allow you to animate elements via microthemes. A use case for this would be to have a section fade up and in to a page via scroll.

Accordion

Accordion will allow you to organize content vertically into separate sections that expand and contract when clicked on. A use case for this would be to create a FAQ of product or service related questions, where each accordion label would have its own questions and the answer within the accordion section.

Feature 5

Vestibulum ante ipsum primis in faucibus orci luctus et ultrices posuere cubilia curae; Fusce eleifend erat at augue bibendum facilisis nec a odio. Nulla facilisi. Ut nec nulla gravida, egestas lacus ac, laoreet sapien. Mauris at augue orci. Pellentesque non egestas elit. Sed consequat ex sem, cursus facilisis felis semper pharetra. Ut tempus nec metus nec laoreet.

How-to use

Here is a helpful guide on how to handle all the major features, abilities, and interactive elements available to make the most out of this template.

To add new questions, additional flow steps will be needed. The easiest way is to select an existing flow step that is not the last flow step. Copy the existing flow step into the flow. 


Mac: Select the flow step, hold the Option key and drag it to your desired place on the flow. A dark green line will appear. This will indicate the placement of the new flow step.


Windows: Select the flow step, hold the Alt key and drag it to your desired place on the flow. A dark green line will appear. This will indicate the placement of the new flow step.


*Do not copy it to the bottom of the flow. The choices on the last flow step have a different behavior in comparison to the ones that come prior to it. The choices on the final flow step have an action to go to the result page, whereas the choices on the other flow steps have a behavior to send the user to the next question.


Update the icon, caption, question, and choices.
Select the choice group and update the Data Field.
Select the Flow Step and update the tag for behavioral tracking purposes.

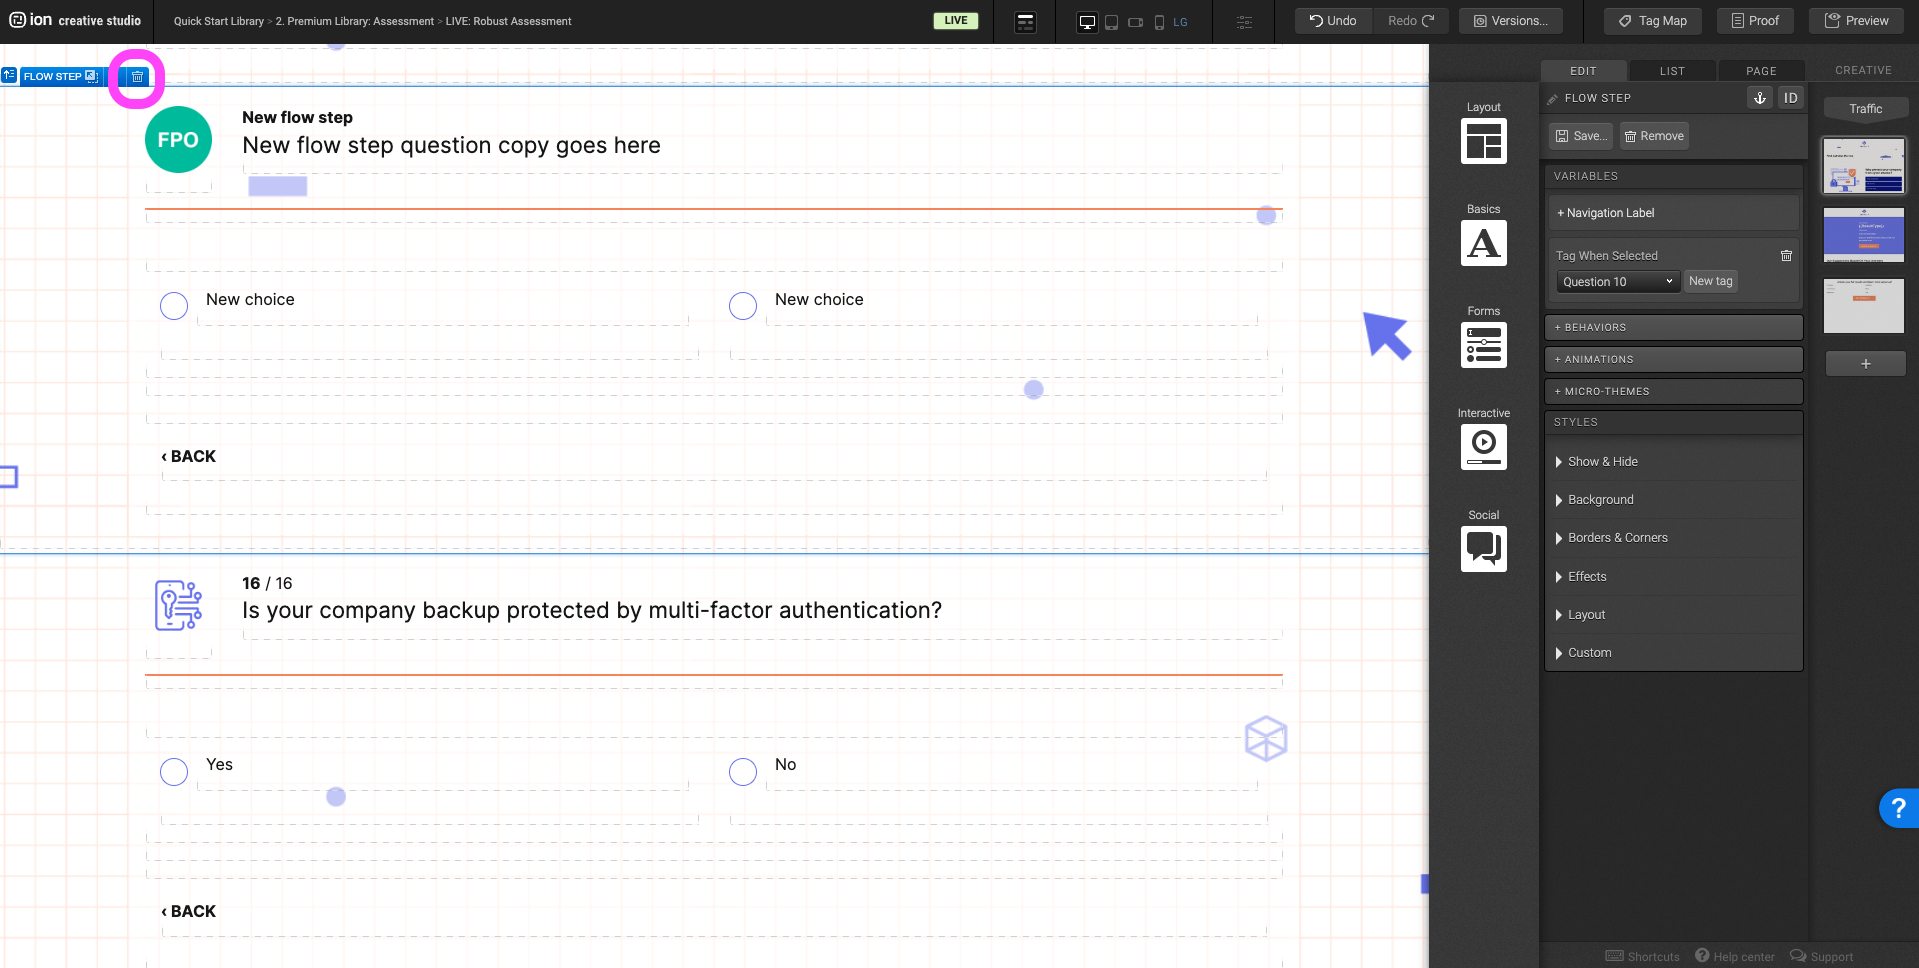
If the assessment has less than 16 questions, select the flow step and click on the trash can icon to remove.


*Ideally, the last flow step should not be the one that is removed since the action is different from the rest of the flow step. This will save you time from having to adjust the flow step behavior.

Select an already existing choice and duplicate it by holding the Options key on Mac or the Alt key on Windows, and place the choice into an empty column. 


If an empty column doesn’t exist, navigate to the row that the choice group lives within. Duplicate the row into the Responsive Grid.

Update the choice copy. Select the new choice and update the Data Value.

To edit the accordion title, select the Accordion and navigate to the Variables panel. Expand the Section you would like to edit, double click on the Label to edit the accordion title. Don’t forget to also update the tag.

To update the description within the accordion sections, expand the corresponding accordion section, and double click on the text. The text editor will open and you can edit the text accordingly.
To add an additional accordion section, select the Accordion and navigate to the variables panel. Expand the next empty accordion section. Click +Label to add an accordion title and don’t forget to add a tag.
Navigate to the Basics components and drag a text element into the new accordion section.

To edit the Resource icon, select the image within the Reveal Trigger. Double click on the image, select <reselect image and upload the new image.

Be mindful of the icon size. Ideally for this experience icons should be 80px x 80px. If the new image is greater or less than 80px x 80px, resize and crop the image to the ideal dimensions.

To add an animation to an element, select the element and navigate to the +Animations panel. In the first dropdown select the trigger (scroll into view, immediate, etc.) and in the second dropdown select the animation type.

To remove an animation, select the element with the animation already applied to it. Navigate to the Animations panel and click on the “x” icon.
To adjust an already existing animation, select the element with the animation already applied to it. Navigate to the Animations panel, in the first dropdown select the new trigger and in the second dropdown select the new animation type.

Logic template

Here is the logic’s template and quick video tour to make it easier for you when handling this template, from overviewing the rules, to understanding the formulas, to editing the logic or equations as necessary.
Preview Logic TemplateOpens in a new window.Watch Logic Video TourOpens in a new window.

Content structure

Here is the content structure’s template to make it easier for you when providing content guidelines or creating the copy for this template, from understanding the content structure to getting to know the amount of words needed to each text piece.
Preview Content Writing TemplateOpens in a new window.

Best practices

Be sure to tag everything that is "taggable" so that you are able to review everything at a later time in your reports.

Reveals
Flows
Flowsteps
Links
Tabs
Accordions
Lightboxes
Rotators
Sliders

Your conversion point is the most important measurement in determining whether your creative is converting visitors. We recommend having one conversion point per creative. Here is the element and methods in which to set your conversions:

Links
Behaviors
Actions

Before going live with your experience, you want to run a final proofing process. This will review the experience as a whole, with any final revisions necessary. Here is the most important items to be reviewed before GoLive:

  • Review of any integrations
  • Review of conversion point
  • Review of tagging
  • External links are working correctly (opening in a new window)
  • Mark respondents as always new if used for conference or live event
  • Uncheck the robot meta directives (no archive, no follow, no index)
  • Remove path description (if applicable)
  • Make sure traffic source has been added to social share — og URL, twitter (create bit.ly), email share
  • Once live, debug on Facebook (if applicable)

Related templates

If you like this template, you might want to check out these other similar models.

Have a question?

Still have questions or are facing troubles when handling this template? Please do not hesitate to send any additional questions, so we can make sure to have this page constantly up to date.